On-Camera Flash Doesn’t Have to Look Bad: How I Use Bounce Flash to Create Beautiful Light
May 07, 2026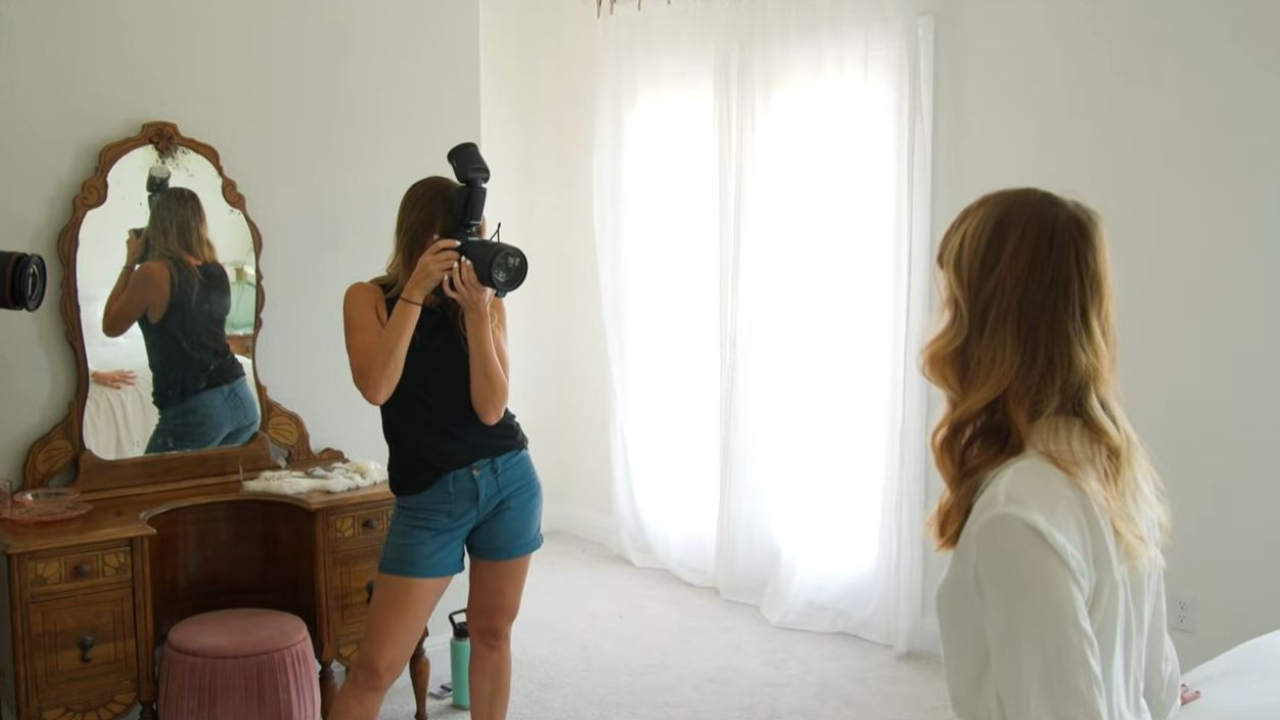
When people hear “on-camera flash,” they usually think of harsh, flat, unflattering light. And honestly… I get it. That’s what it looks like when it’s used the wrong way.
But here’s the truth: on-camera flash doesn’t have to look bad at all.
I use it all the time to create soft, directional, even studio-like lighting, without needing a full lighting setup. Let me walk you through exactly how I do it using bounce flash, reflectors, and a little creativity.
What I Love About Bounce Flash
Instead of pointing my flash directly at my subject, I turn it and bounce it off a wall or ceiling.
What that does is turn that surface into my main light source, and because it’s much bigger than my flash, the light becomes soft and flattering.
That’s the secret. Bigger light source = better light.
1. How I Create Clean, Soft Light
When I want something simple and beautiful, I:
- Turn my flash 45° up and behind me
- Let it bounce off the wall
- Use that as a soft fill light
This gives me:
- Smooth skin tones
- Even lighting
- A really clean, polished look
It’s my go-to when I need something quick that still looks professional.
2. How I Add Direction and Depth
If I want more drama or dimension, I stop bouncing behind me and start bouncing off to the side.
I’ll:
- Pick a wall to my left or right
- Position my subject so the light hits from that direction
Now instead of flat light, I get:
- Shadows along the face
- A defined jawline
- More texture in the image
It instantly makes the photo feel more intentional and high-end.
3. How I Use Negative Fill for More Drama
One of my favorite tricks is using the black side of a reflector.
Most people think reflectors are just for adding light, but I use them to take light away.
When I place the black side close to my subject, it:
- Blocks unwanted light bounce
- Deepens shadows
- Adds contrast
This gives me that sculpted, dramatic look without changing my flash at all.
4. How I Get Creative with Gels
When I want something more creative, I’ll add gels to my flash.
For example, I might:
- Add a blue gel
- Bounce it off the wall
- Let it fill the shadows behind my subject
Sometimes I keep the light on the face natural and just add color in the background. Other times, I go all in and make the color the main light.
It’s such an easy way to create something unique without needing a full studio setup.
5. How I Shape Light Like a Studio
At this point, I’m really just shaping light.
I’ll combine:
- Bounce flash
- Reflectors
- Positioning
And adjust everything slightly until I get:
- Clean highlights
- Controlled shadows
- A defined face shape
There are moments where it honestly looks like I’m using studio lighting, but it’s just my on-camera flash doing all the work.
Final Thoughts
At the end of the day, this is what I’ve learned:
You don’t need complicated gear to create beautiful light.
With just:
- An on-camera flash
- A wall or ceiling
- A reflector
- And maybe a gel or two
I can create a wide range of looks, from soft and natural to bold and dramatic.
It all comes down to understanding how light works and being intentional with how I use it.
And once you get that?
Your on-camera flash becomes one of the most powerful tools you own.
See if it’s the right fit for you: https://www.breatheyourpassion.com/photo-insiders-mastermind-optin

Want my Lightroom Presets? Here's your way to the shop: https://vanessajoy.samcart.com/products/the-complete-editing-bundle